How To Integrate Myuser Into Microsoft Dynamics 365
Connect Microsoft Dynamics 365 Sales to Myuser in 10 minutes with your own Microsoft Entra app - contacts, accounts, deals, meetings and call logs, no Microsoft approval needed.
In this blog post, we'll guide you step-by-step through integrating Microsoft Dynamics 365 Sales with Myuser. You create a small app in your own Microsoft account and give it access to Dynamics 365 - no Microsoft approval or marketplace listing needed. This integration enables Myuser to automatically read and write contact and company (account) information, log your outreach emails, booked meetings and calls on each contact's timeline, and create deals (opportunities) on your sales process - ensuring smoother and more efficient management of your outreach activities.
The whole setup takes about 10 minutes and you stay in full control: the credentials are created in YOUR Microsoft account, the app can only do what the security role you give it allows, and you can switch it off at any time. The app user this guide creates does not use up a Dynamics 365 license.
Before you start: you need admin rights in your Microsoft account - permission to register apps in Microsoft Entra and to manage your Dynamics 365 environment in the Power Platform admin center (a Global administrator or a System Administrator of the environment can do both).
Step 1: Register an app in Microsoft Entra
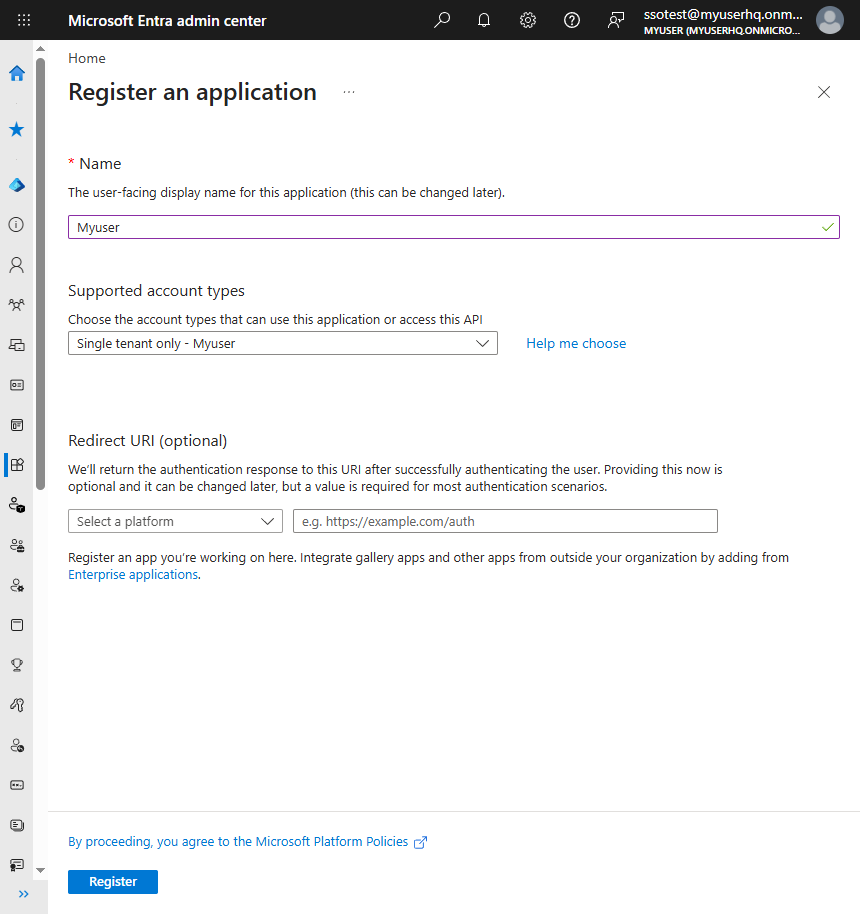
Sign in to entra.microsoft.com with your work account and open Applications > App registrations > + New registration.
- Name: enter Myuser.
- Supported account types: keep Single tenant only (accounts in your organization only).
- Redirect URI: leave it empty.
Click Register.
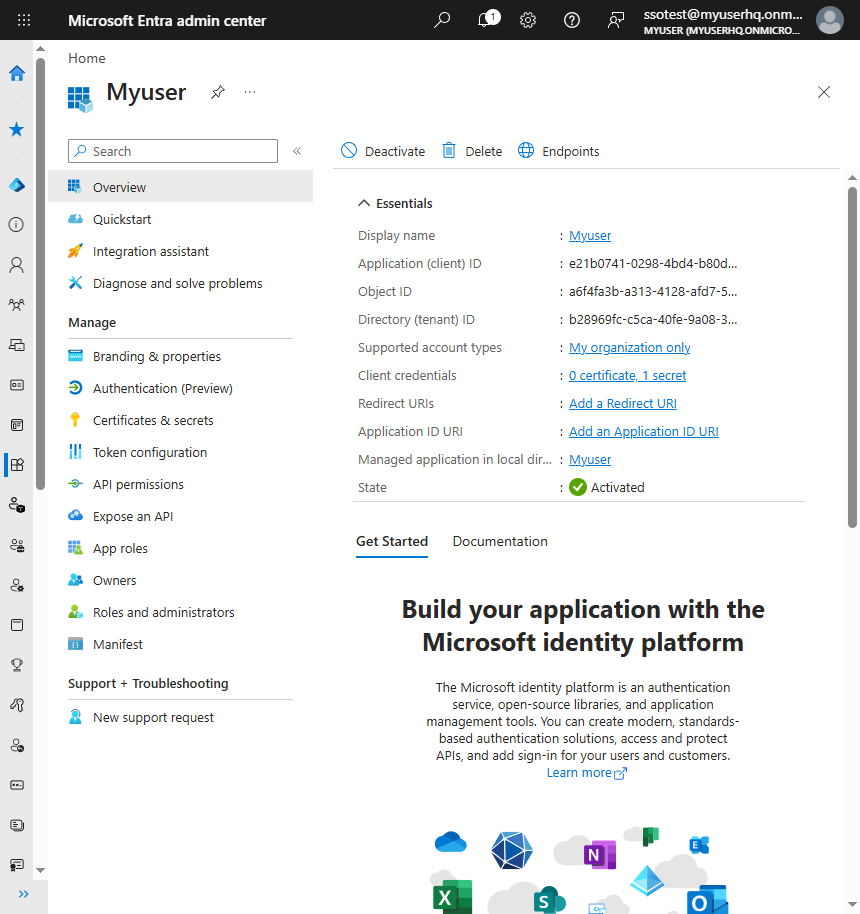
The app's Overview page opens. Copy the Application (client) ID - this is your Client ID. You'll paste it into Myuser in the last step.
Step 2: Create a Client Secret
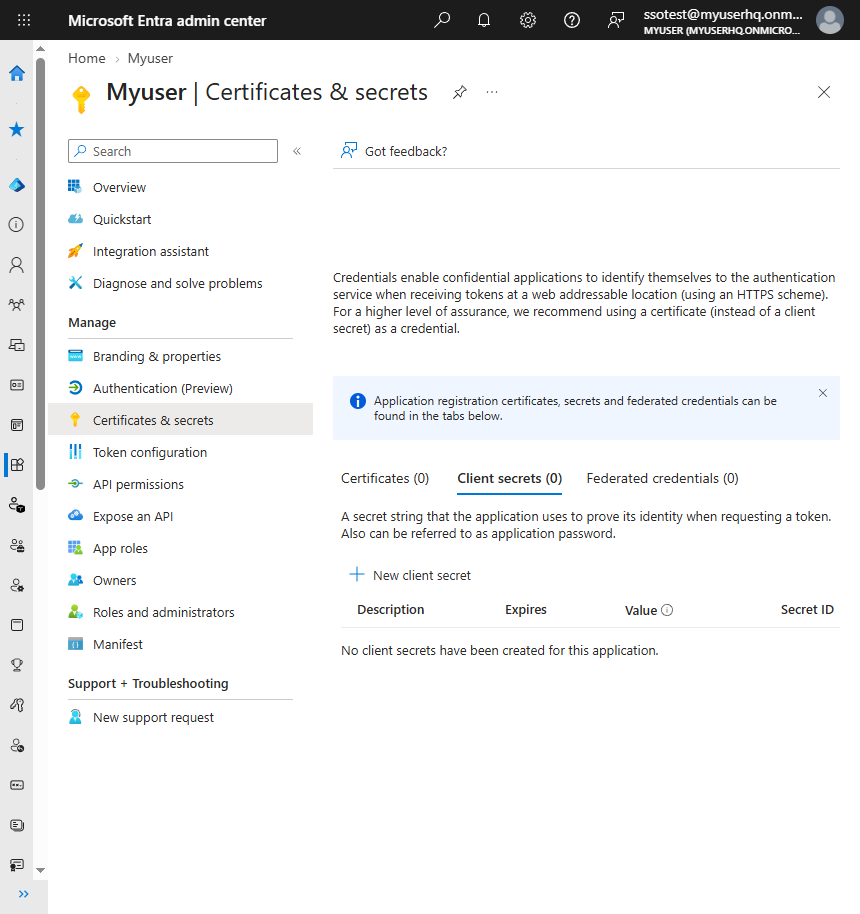
In the app's left menu, open Certificates & secrets, stay on the Client secrets tab and click + New client secret.
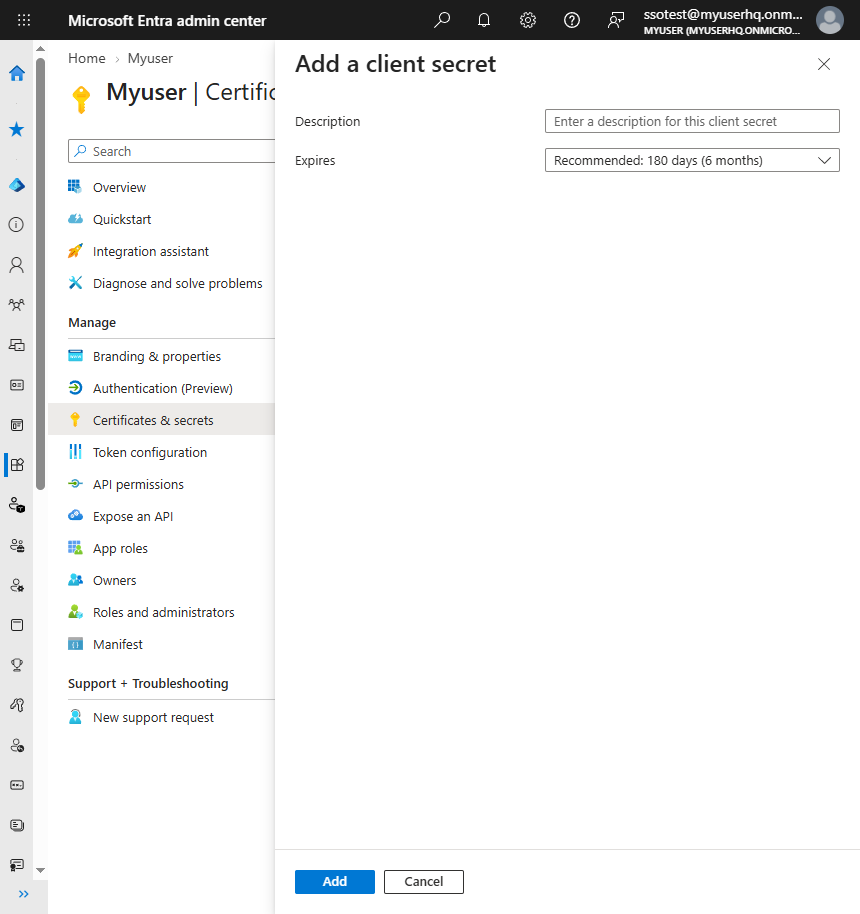
Enter Myuser as the description, choose how long the secret should last (up to 24 months) and click Add.
Copy the Value right away with the copy button next to it - this is your Client Secret.
Important: copy the Value column, not the Secret ID. Microsoft shows the Value only once - if you leave the page before copying it, simply create a new secret.
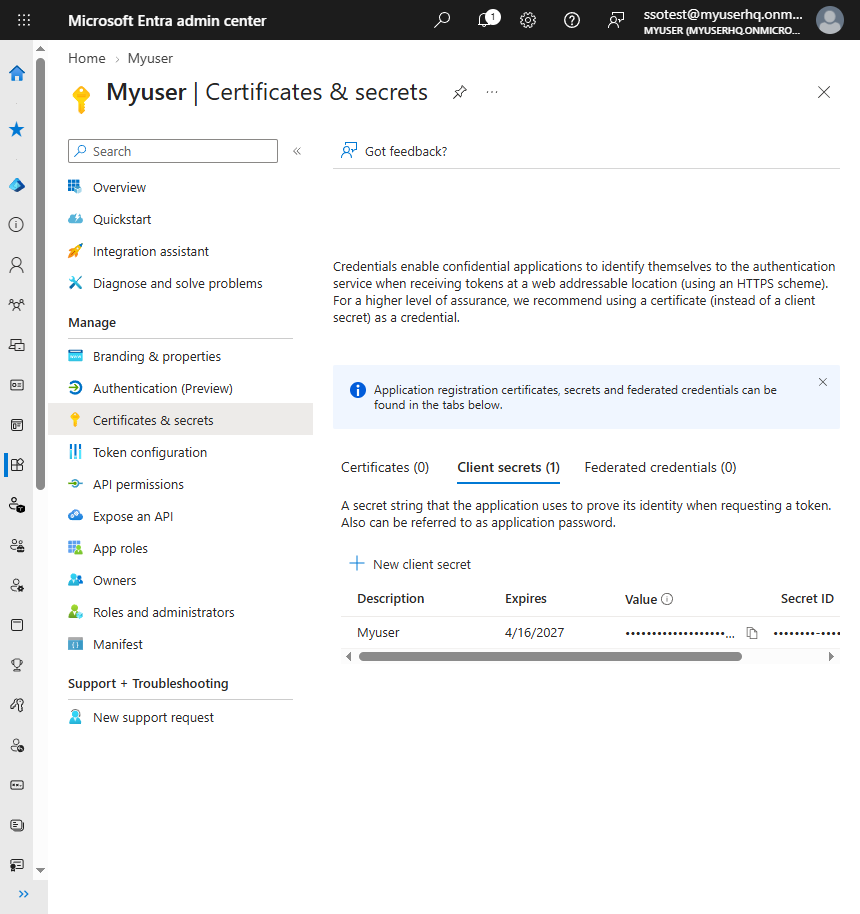
Treat the secret like a password: together with the Client ID it gives access to your CRM.
Step 3: Give the app access to Dynamics 365
Now tell Dynamics 365 to accept the app. Open the Power Platform admin center, go to Manage > Environments and click the environment your Dynamics 365 Sales runs in.
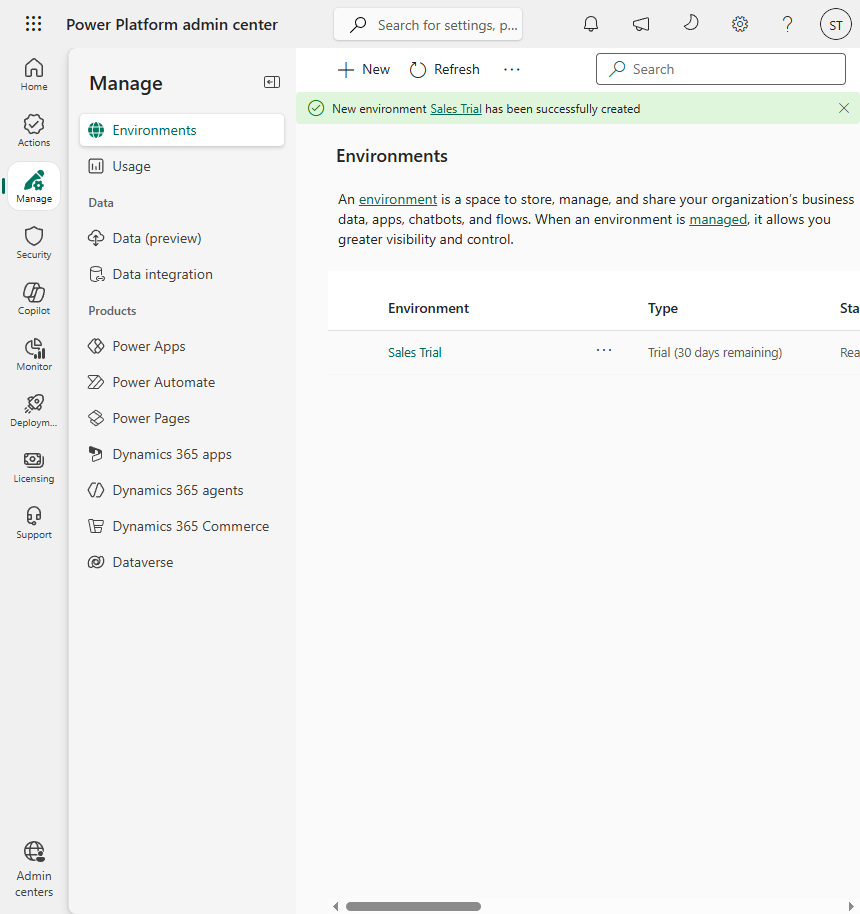
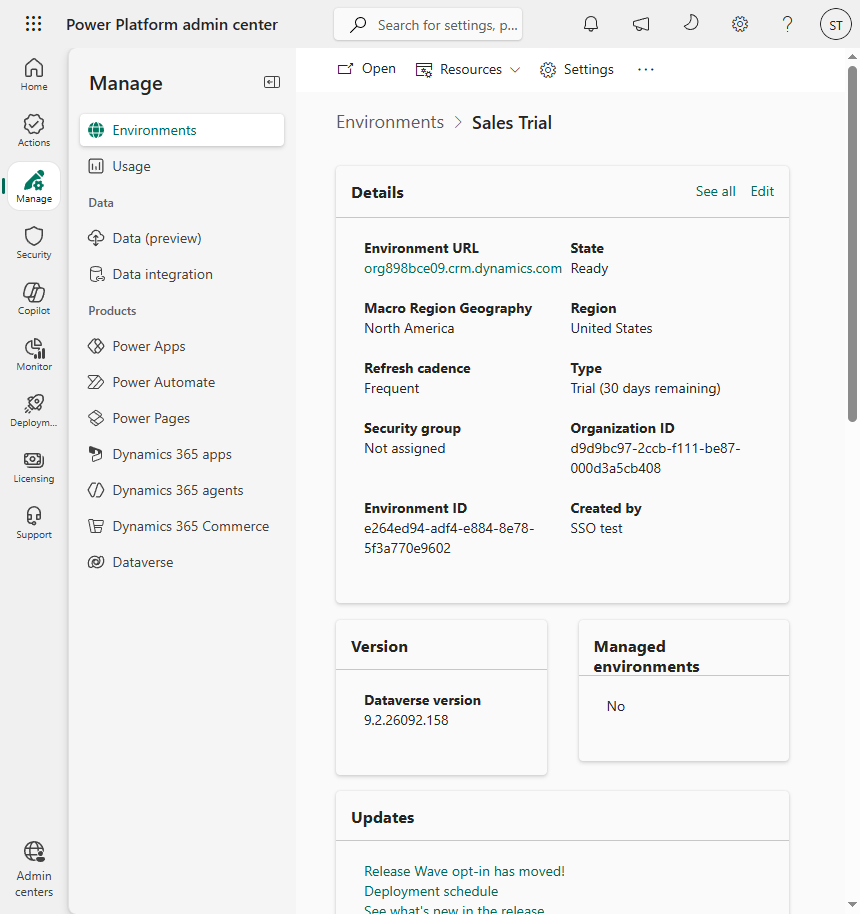
The environment page shows your Environment URL (like yourorg.crm.dynamics.com) - copy it, you'll need it in Step 4. Then click Settings at the top.
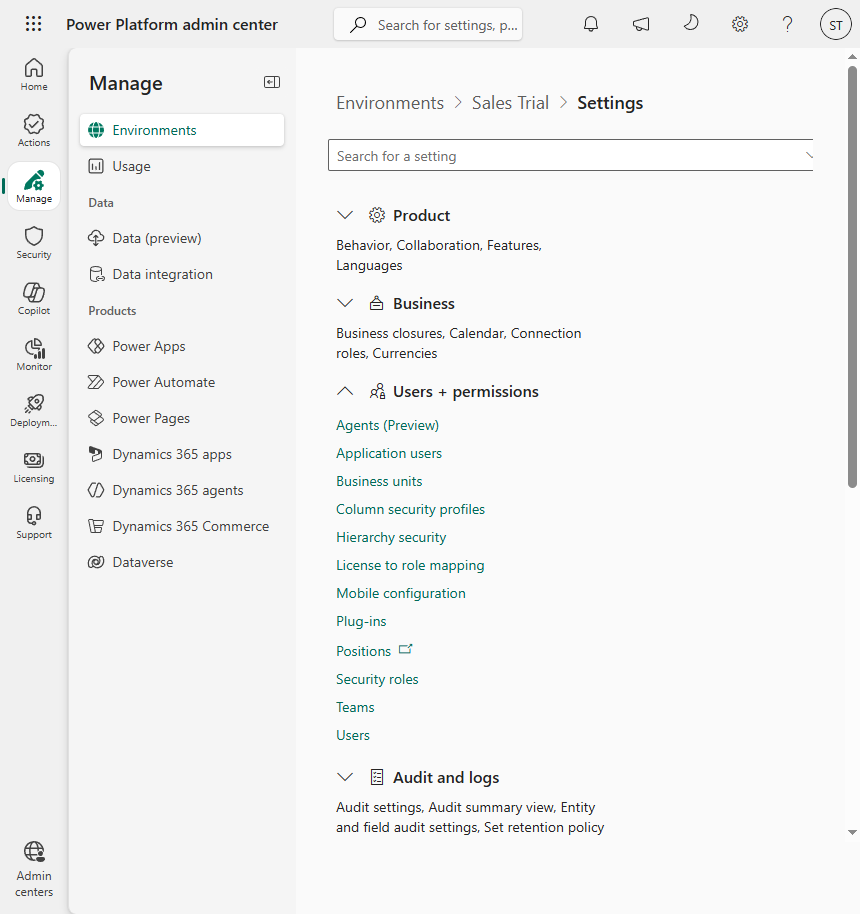
Expand Users + permissions and click Application users.
Click + New app user.
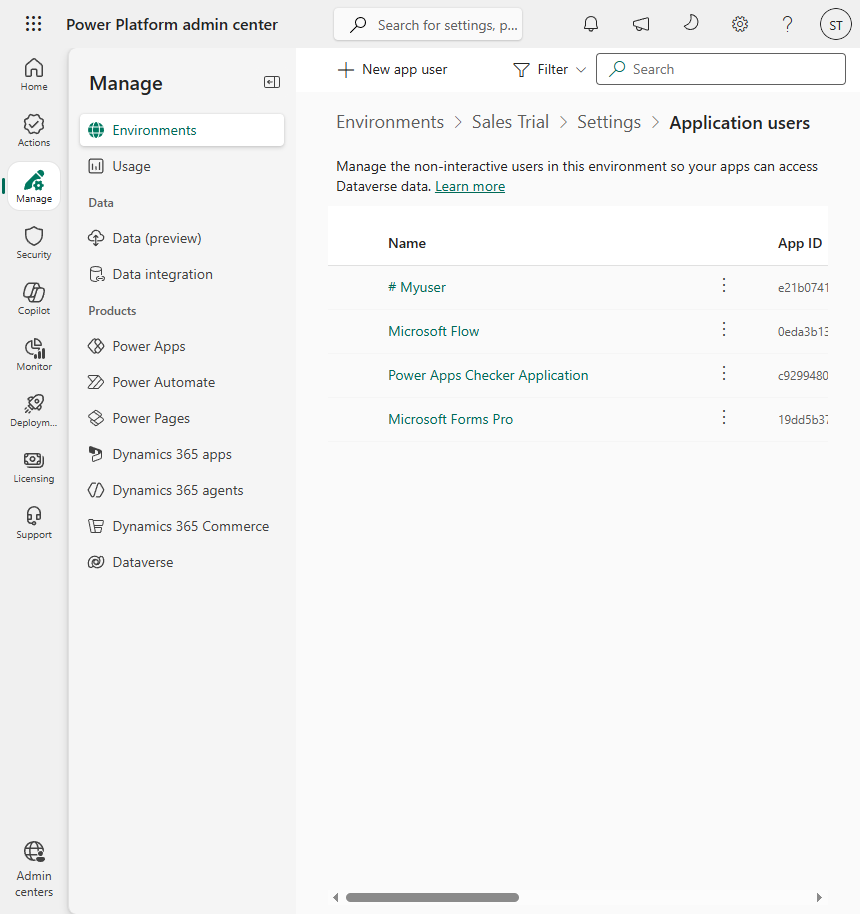
In the panel that opens:
- Click + Add an app, pick the Myuser app you registered in Step 1 and click Add.
- Business unit: pick your main business unit (the one named after your organization).
- Security roles: click the pencil icon, tick Sales Manager and click Save.
Click Create.
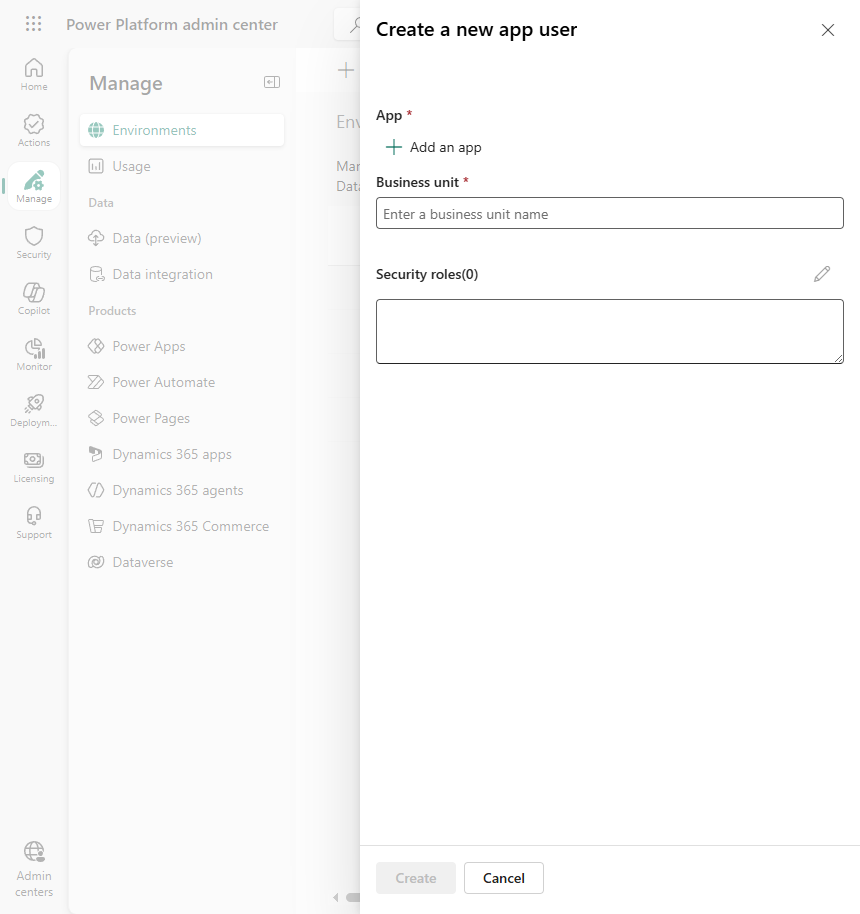
The app now appears in the list, with a # in front of its name (that is how Dynamics marks app users). To check or change its role later, open the More actions menu (the three dots) next to it and choose Edit security roles - Sales Manager should be ticked.
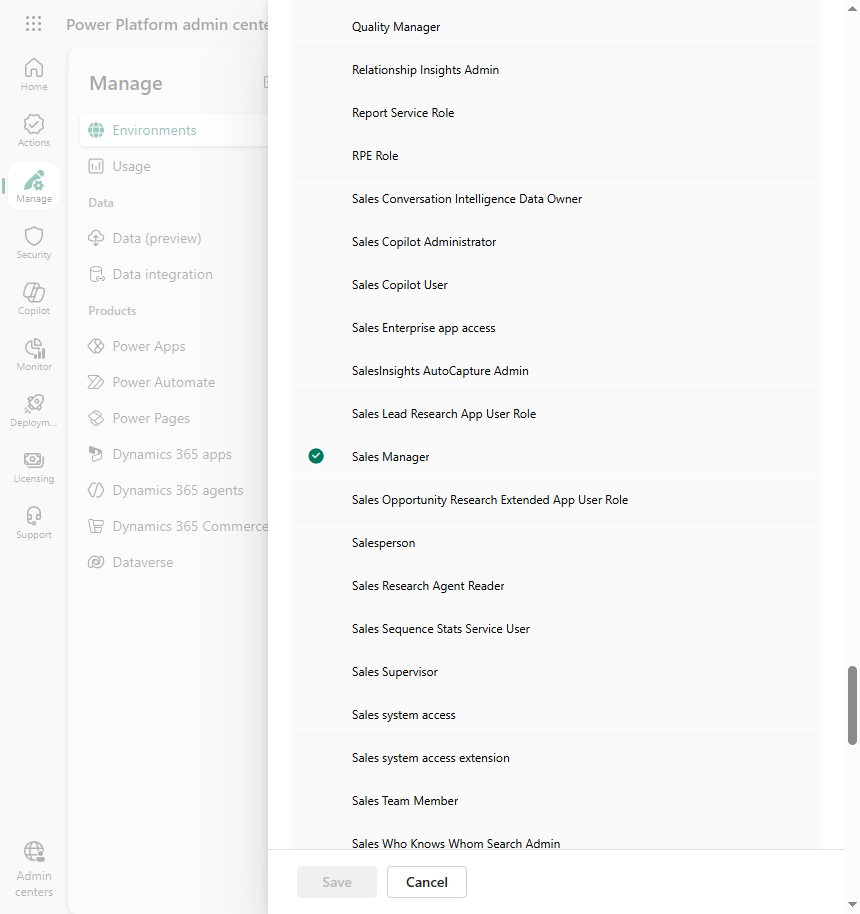
Giving the app the Sales Manager role is important. Without it, the integration will fail to function as intended. Here is what the role lets Myuser do:
- Contacts and accounts - read lets us check whether a contact or company already exists so we never create duplicates; write lets us create and update them.
- Activities (emails, appointments and phone calls) - log your outreach, booked meetings and calls on each contact's timeline, and read the meetings booked in your CRM so the booking sync can detect them.
- Opportunities and the sales process - create deals and place them on the first stage of your sales process bar (we never change your stage definitions).
If your company prefers a custom security role, give it the same access to contacts, accounts, opportunities, activities and processes.
Step 4: Connect It in the Myuser Dashboard
Finally, navigate to the Myuser dashboard, open Integrations and expand the Microsoft Dynamics 365 card under the CRM section. Fill in the three fields:
- Environment URL - from Step 3. You can also just copy whatever is in your browser's address bar while Dynamics 365 is open - we keep only the
https://yourorg.crm.dynamics.compart, however long the URL is. - Client ID - the Application (client) ID from Step 1.
- Client Secret - the secret's Value from Step 2.
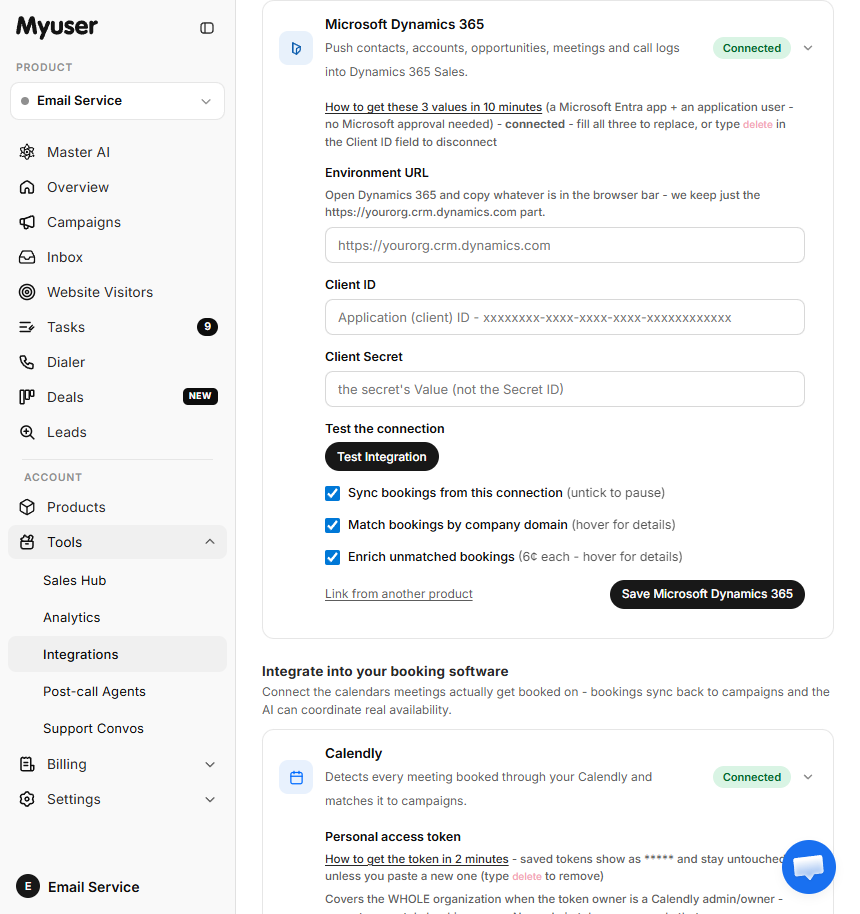
Click Test Integration, then Run test. Myuser checks the connection and saves it automatically, then pushes live test records - an account, a contact, a logged email, a meeting and a deal - and links every record it created so you can open them in Dynamics 365. Green lines everywhere means you're all set!
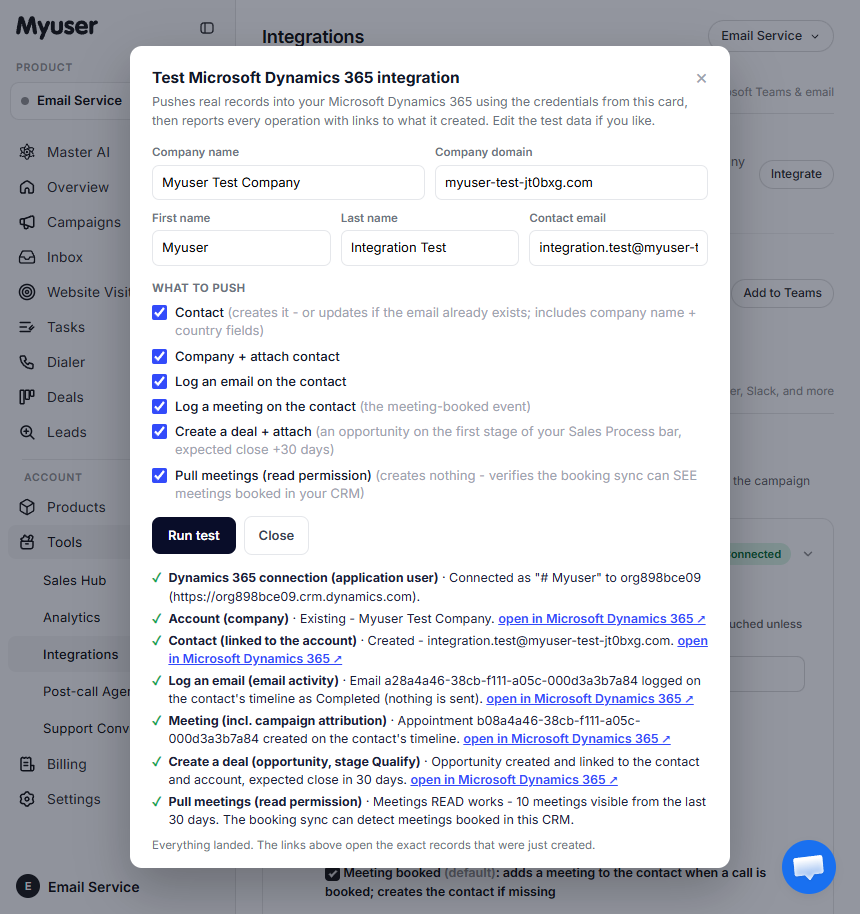
Congratulations - your Microsoft Dynamics 365 integration is now ready, allowing seamless transfer of lead information and faster management of your outreach efforts.
Troubleshooting
- "The Client Secret is wrong" - you most likely copied the Secret ID instead of the Value. Create a new secret (Step 2) and copy its Value right away.
- "That Client Secret has expired" - create a new secret (Step 2) and paste its Value on the card.
- "Microsoft does not know that Client ID..." - re-copy the Application (client) ID from the app's Overview page, and make sure the app is registered in the same Microsoft account your Dynamics 365 runs in.
- "Microsoft accepted the app, but Dynamics 365 refused it" - the app user from Step 3 is missing, or it was added to a different environment. Add it to the environment whose URL you pasted.
- A permission error on one of the test lines - the app user does not have the Sales Manager role. Add it (Step 3) and run the test again - the card's "See how to fix" button walks you through it.
- "That address did not answer like a Dynamics 365 environment" - check the Environment URL. It looks like
https://yourorg.crm.dynamics.com(outside North America thecrmpart has a number, for examplecrm4in Europe).
Staying in control
- The connection can do exactly what the Sales Manager role allows - nothing more.
- Deactivating the app user (Step 3) cuts off access right away. Deleting the client secret (Step 2) cuts it off within an hour, once the last sign-in Microsoft issued expires.
- Secrets expire on the date you chose. Create a new one before then and paste its Value on the card to keep the sync running.
- To disconnect from the Myuser side, type
deleteinto the Client ID field on the Microsoft Dynamics 365 card and save.
Need Help?
If you have any questions or encounter issues during this integration process, please reach out to our support team - we're always here to assist!
Happy Integrating!